石头记

Docker、Kubernetes、CI/CD 等技术分享

Gitlab部署和基本使用

关于版本控制系统

版本控制是一种记录一个或若干文件内容变化,以便将来查阅特定版本修订情况的系统。在软件开发过程中,为了更好的管理软件的多个开发版本我们通常需要使用版本控制系统。常用的版本控制系统有:svn和git。

svn是集中化的版本控制系统, 只有一个单一的集中管理的服务器,保存所有文件的修订版本,而协同工作的人们都通过客户端连到这台服务器,取出最新的文件或者提交更新。

SVN

git是分布式的版本控制系统, 每一个终端都是一个仓库,客户端并不只提取最新版本的文件快照,而是把原始的代码仓库完整地镜像下来。每一次的提取操作,实际上都是一次对代码仓库的完整备份。

git

安装Docker

参考Harbor安装文档进行Docker安装。

启动Gitlab

1
2
3
4
5
6
7
8
9
$ docker run --detach \
--hostname git.hipstershop.cn \
--publish 443:443 --publish 80:80 --publish 2222:22 \
--name gitlab \
--restart always \
--volume /data/gitlab/config:/etc/gitlab \
--volume /data/gitlab/logs:/var/log/gitlab \
--volume /data/gitlab/data:/var/opt/gitlab \
gitlab/gitlab-ce:latest

配置Gitlab

Gitlab启动时会将/data/gitlab目录挂载到容器里,容器启动后会在这个目录下生成3个目录–config、data和logs,配置文件会放到config目录下,数据库的数据会存储到data目录下,日志会存储到logs目录下。

如何修改Gitlab配置

只需要修改/data/gitlab/config/gitlab.rb,然后登陆容器,执行如下命令:

1
2
3
4
5
6
7
$ docker ps
CONTAINER ID IMAGE COMMAND CREATED STATUS PORTS NAMES
72960f7f0e12 gitlab/gitlab-ce:latest "/assets/wrapper" About a minute ago Up About a minute (health: starting) 0.0.0.0:80->80/tcp, 0.0.0.0:443->443/tcp, 0.0.0.0:2222->22/tcp gitlab

$ docker exec -ti 72960 bash
$ gitlab-ctl reconfigure
$ gitlab-ctl restart

修改Gitlab对外URL

修改/data/gitlab/config/gitlab.rb,去掉对external_url的注释,并修改成正确的域名:

1
external_url 'https://git.hipstershop.cn'

配置Gitlab使用HTTPS协议

1
2
3
4
5
6
7
$ mkdir -p /data/gitlab/config/ssl
$ chmod 700 /etc/gitlab/ssl
$ cp git.hipstershop.cn.key git.hipstershop.cn.crt
$ vi /data/gitlab/config/gitlab.rb
# 修改证书路径
nginx['ssl_certificate'] = "/etc/gitlab/ssl/git.hipstershop.cn.crt"
nginx['ssl_certificate_key'] = "/etc/gitlab/ssl/git.hipstershop.cn.key"

配置Gitlab使用LDAP登陆

需要根据LDAP信息进行填写:

1
2
3
4
5
6
7
8
9
10
11
12
13
14
15
16
17
18
19
20
21
22
23
24
25
26
27
28
29
30
31
32
33
34
35
36
37
38
39
40
41
42
43
44
45
46
47
48
49
50
51
52
53
54
55
56
57
$ vi /data/gitlab/config/gitlab.rb
gitlab_rails['ldap_enabled'] = true
gitlab_rails['ldap_servers'] = YAML.load <<-EOS # remember to close this block with 'EOS' below
main: # 'main' is the GitLab 'provider ID' of this LDAP server
## label
#
# A human-friendly name for your LDAP server. It is OK to change the label later,
# for instance if you find out it is too large to fit on the web page.
#
# Example: 'Paris' or 'Acme, Ltd.'
label: 'LDAP'

host: '192.168.100.100'
port: 389 # or 636
uid: 'sAMAccountName'
encryption: 'plain' # "start_tls" or "simple_tls" or "plain"
bind_dn: 'hipstershop\op'
password: '_the_password_of_the_bind_user'

# Enable smartcard authentication against the LDAP server. Valid values
# are "false", "optional", and "required".
smartcard_auth: false

# This setting specifies if LDAP server is Active Directory LDAP server.
# For non AD servers it skips the AD specific queries.
# If your LDAP server is not AD, set this to false.
active_directory: true

# If allow_username_or_email_login is enabled, GitLab will ignore everything
# after the first '@' in the LDAP username submitted by the user on login.
#
# Example:
# - the user enters '[email protected]' and 'p@ssw0rd' as LDAP credentials;
# - GitLab queries the LDAP server with 'jane.doe' and 'p@ssw0rd'.
#
# If you are using "uid: 'userPrincipalName'" on ActiveDirectory you need to
# disable this setting, because the userPrincipalName contains an '@'.
allow_username_or_email_login: false

# If lowercase_usernames is enabled, GitLab will lower case the username.
lowercase_usernames: false

# Base where we can search for users
#
# Ex. ou=People,dc=gitlab,dc=example
#
base: 'OU=op,DC=hipstershop,DC=cn'

# Filter LDAP users
#
# Format: RFC 4515 http://tools.ietf.org/search/rfc4515
# Ex. (employeeType=developer)
#
# Note: GitLab does not support omniauth-ldap's custom filter syntax.
#
user_filter: ''
EOS

更多配置请参考官方文档

Gitlab简单使用

登陆Gitlab

访问地址:https://git.hipstershop.cn
默认用户名:root 首次登录需要设置密码

创建项目组

点击 Create a group 创建一个项目组

创建项目组

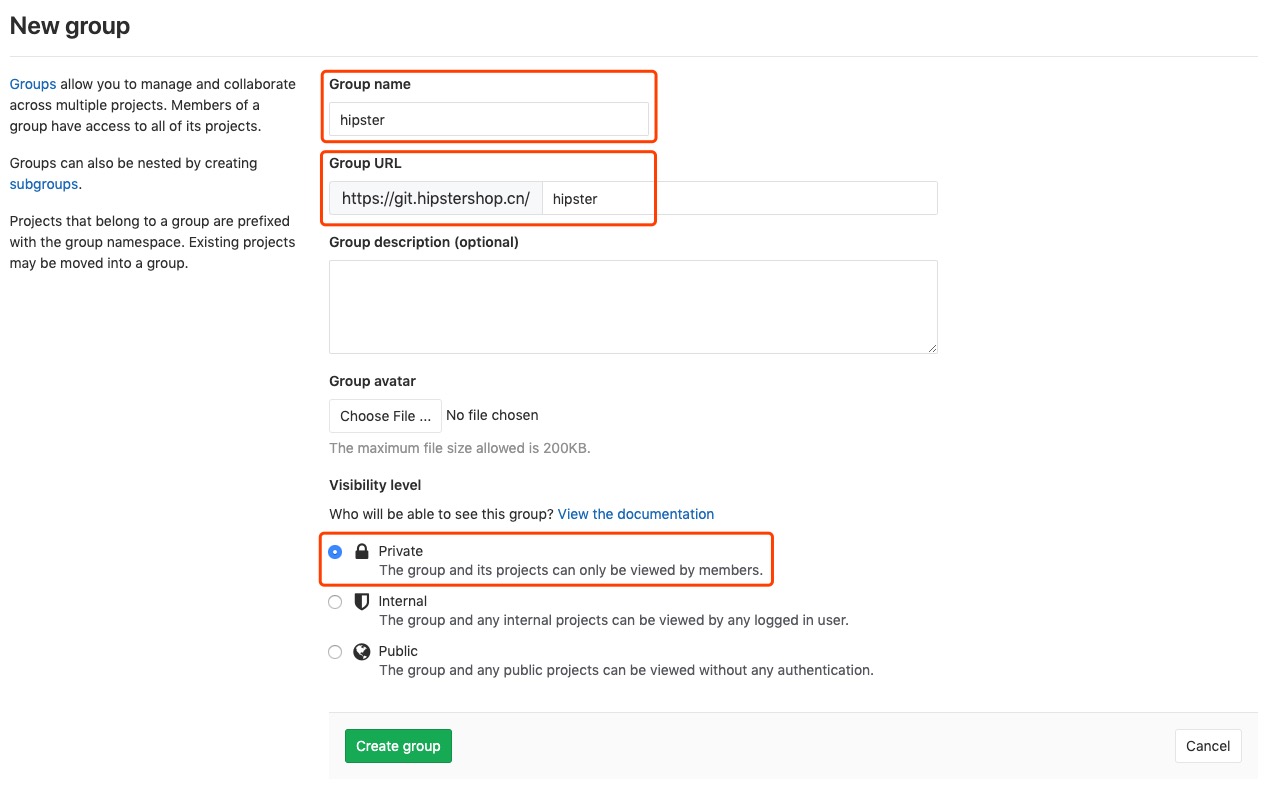
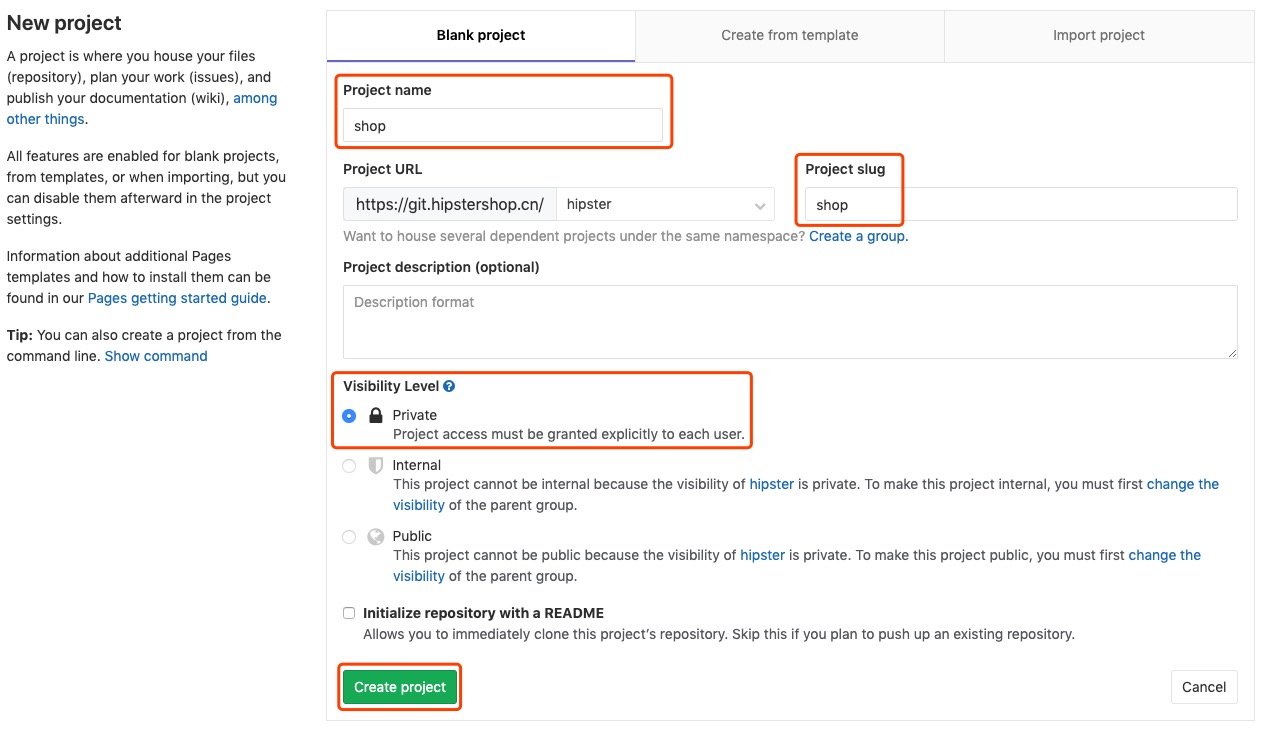
填写 Group name 组名为hipster,自动生成Group URL,项目组为私有,项目组和项目组内的项目只有组成员可见。
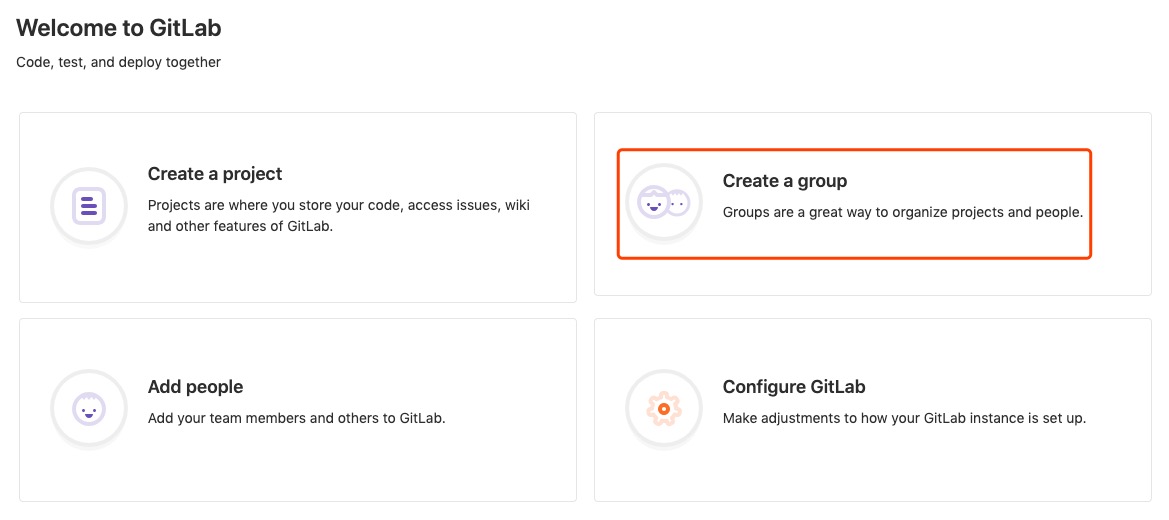
创建项目组描述

创建项目

点击 New project 在hipster组里创建一个项目

创建项目

填写 Project name 项目名为shop,项目权限为私有,只有项目成员可见。
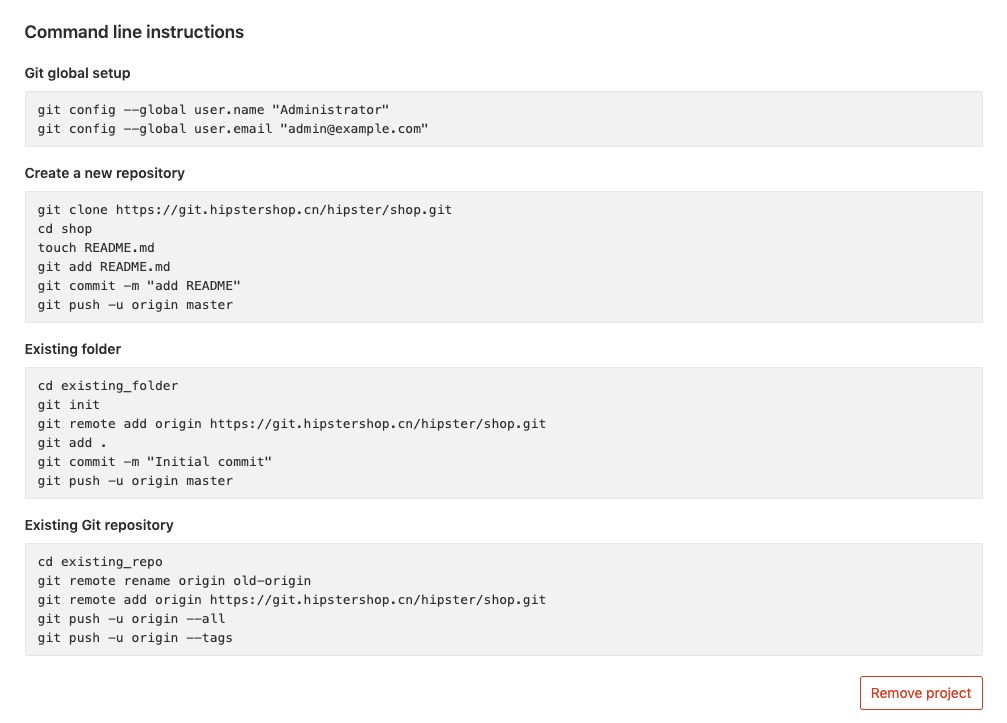
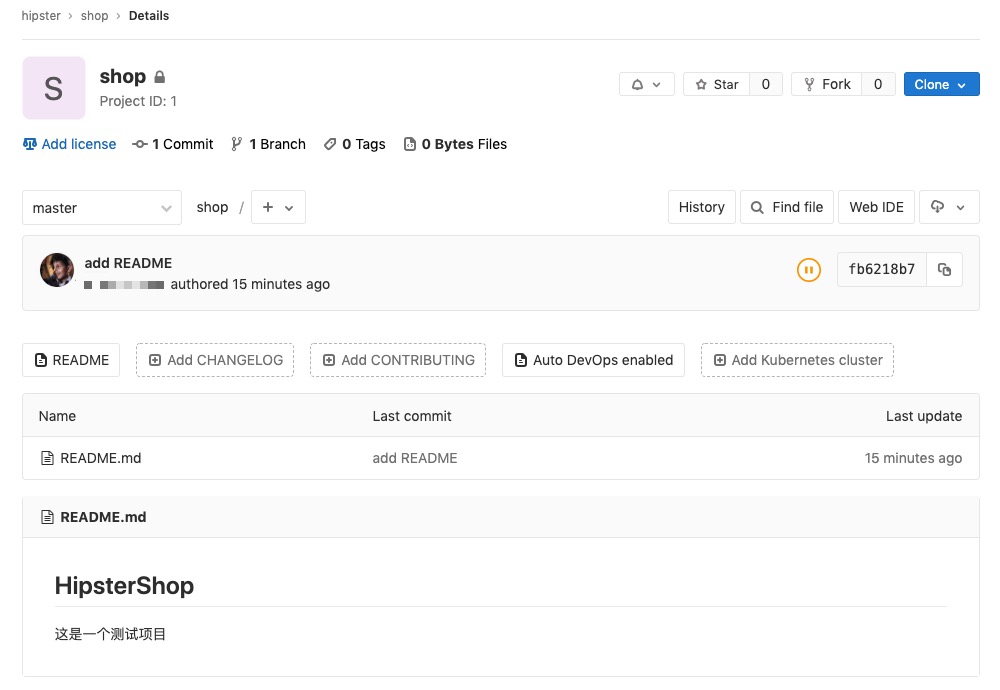
创建项目详情

然后初始化项目

初始化项目

克隆新建的项目

1
2
3
4
5
$ git clone https://git.hipstershop.cn/hipster/shop.git
Cloning into 'shop'...
Username for 'https://git.hipstershop.cn': root
Password for 'https://[email protected]':
warning: You appear to have cloned an empty repository.

创建README文件

1
2
3
$ cd shop
$ touch README.md
$ echo '# HipsterShop' > README.md

提交更改

1
2
3
4
5
6
7
8
9
10
11
12
13
$ git add README.md
$ git commit -m "add README"
[master (root-commit) fb6218b] add README
1 file changed, 4 insertions(+)
create mode 100644 README.md
$ git push -u origin master
Enumerating objects: 3, done.
Counting objects: 100% (3/3), done.
Writing objects: 100% (3/3), 257 bytes | 257.00 KiB/s, done.
Total 3 (delta 0), reused 0 (delta 0)
To https://git.hipstershop.cn/hipster/shop.git
* [new branch] master -> master
Branch 'master' set up to track remote branch 'master' from 'origin'.

在Gitlab项目界面可以看到此次提交

Gitlab项目

创建分支

1
2
3
4
5
6
7
8
9
10
11
12
13
14
15
16
17
18
19
20
21
$ git checkout -b develop
Switched to a new branch 'develop'
$ echo '这是develop分支' >> README.md
$ git add .
$ git commit -m '初始化develop分支提交'
[develop 4766e5a] 初始化develop分支提交
1 file changed, 2 insertions(+)
$ git push --set-upstream origin develop
Enumerating objects: 5, done.
Counting objects: 100% (5/5), done.
Delta compression using up to 4 threads
Compressing objects: 100% (2/2), done.
Writing objects: 100% (3/3), 329 bytes | 164.00 KiB/s, done.
Total 3 (delta 0), reused 0 (delta 0)
remote:
remote: To create a merge request for develop, visit:
remote: https://git.hipstershop.cn/hipster/shop/merge_requests/new?merge_request%5Bsource_branch%5D=develop
remote:
To https://git.hipstershop.cn/hipster/shop.git
* [new branch] develop -> develop
Branch 'develop' set up to track remote branch 'develop' from 'origin'.

Gitlab项目分支

更多git知识请参考git官方中文文档

Proudly powered by Hexo and Theme by Hacker
© 2019 ist0ne